Creating an Office 365 Outbound Connector
Source: docs.titanhq.com Product: SpamTitan Imported content type: docs_page Product stream: legacy
Creating an Office 365 Outbound Connector
Section titled “Creating an Office 365 Outbound Connector”Abstract
Follow our simple guide for the steps to create a smart host outbound connector between your Office 365 and SpamTitan.
Follow the steps below to create a smart host outbound connector between your Office 365 and SpamTitan.
-
Log on to your Office 365 Exchange Admin Center (EAC).
-
Select Mail flow and then Connectors from the sidebar menu to view your connectors.
-
Select
 Add a connector and the ‘New connector’ window displays. Select the fields as shown: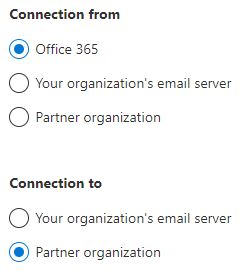
-
Select Next and the ‘Connector name’ window displays.
-
In the Name: field, give the connector a meaningful name, e.g. SpamTitan Outbound.
-
In the Description: field enter an optional description for this connector, e.g. Connector for SpamTitan Outbound.
-
Unselect Turn it on. You can enable this connector once you are ready to cutover mail flow.
-
Select Next.
-
-
In the ‘Use of connector’ window:
-
Select Only when email messages are sent to these domains.
-
Enter * in the dialog box and click
 .
.
-
Select Next.
-
-
In the ‘Routing’ window:
-
Select Route email through these smart hosts.
-
Enter the hostname or IP address for your smart host, e.g. cloud-out-c.spamtitan.com, and click
. -
Repeat Step 2 for each smart host you want to add. Select Next when done.
-
-
Select Next on the ‘Security restrictions’ window to accept the default TLS settings.
-
In the ‘Validation email’ window, you can enter an external email address (outside your organization) to test the connection:
-
Enter an external email address, e.g. test@example.com and click
. -
Select Validate and a test email will be sent to the address provided.
-
-
A summary page displays the information you have entered above. Verify the information is correct and click Next.
-
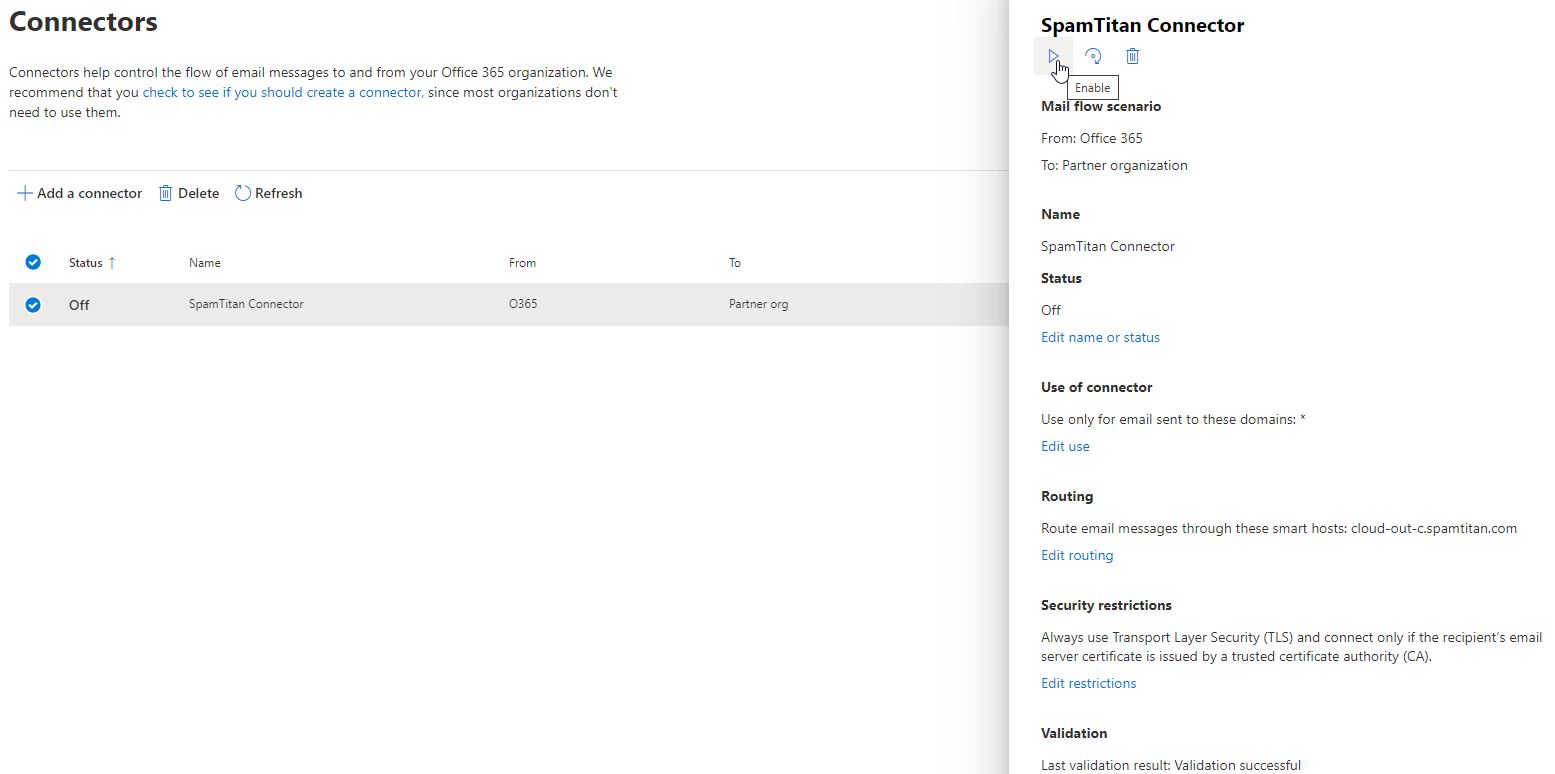
When you are ready to start routing mail through SpamTitan, ensure your connector status is ‘On’. To do this, go to Mail flow > Connectors, highlight this connector and click the enable icon.
-
Your connector is now active and you can start routing outbound mail through SpamTitan.