Adding Customers
Source: support.titanhq.com Product: SpamTitan Imported content type: docs_page Product stream: skellig
Adding Customers
Section titled “Adding Customers”-
Go to Overview and from the Actions dropdown menu, select Add Customer.
-
First, add the customer business name details and select Add.
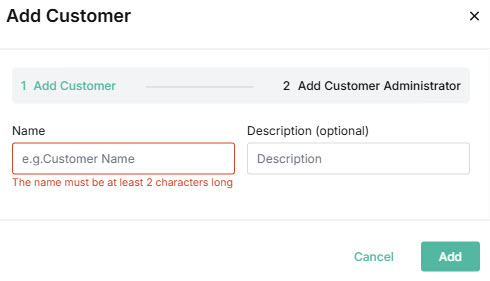
-
Next, add the Customer Administrator details:
-
First Name: Enter the first name of this administrator.
-
Last Name: Enter the last name of this administrator.
-
Email: Enter an email address for this administrator.
-
Link Lock Admin: Select YES to allow this administrator to enable and manage Link Lock. See Link Lock Admin.
-
Password: Enter a password for this administrator.
-
Confirm Password: Confirm the password.
-
-
Select Add to save this customer or Cancel to close the window and discard changes.
Customer Setup
Section titled “Customer Setup”After a customer account is added to SpamTitan, further setup steps must be completed so a customer can start filtering their email. This setup can be done by:
-
MSP Admin: From the side-bar menu, select the customer and drill down to the customer-level view. You can also select the view
 icon in the Actions column of the All Customers table.
Follow the steps in SpamTitan Customer Setup.
-
Customer Admin: Once a customer is added to SpamTitan, the Customer Admin can log in at the customer level and follow the steps in SpamTitan Customer Setup.
- Customer account credentials are input by an MSP Admin when a customer account is created. See Adding your Customers.