Managing Realtime Blackhole Lists
Source: docs.titanhq.com Product: SpamTitan Imported content type: docs_page Product stream: legacy
Managing Realtime Blackhole Lists
Section titled “Managing Realtime Blackhole Lists”The Realtime Blackhole List (RBL) feature is used to check external databases called DNS Blocklists (DNSbls) which contain lists of IP addresses of known spammers and compromised machines. Once enabled, sending IP addresses (not sender email addresses) are checked against the specified lists and the connection from any listed IPs is dropped before an email is fully delivered.
Go to System Setup > Mail Relay > IP Controls to enable and manage RBLs. Click Enable to enable this feature, then read below for information on adding RBL servers, bypassing RBL checks and testing IPs against RBL servers.
By default, RBL checks are performed after recipient verification checks as they are quicker. However, if you have a local fast caching DNS server and want to perform the RBL checks first, select Before Recipient Verification from the Perform RBL Checks: drop-down menu.
Adding RBL Servers
Once enabled, follow these steps to add an RBL server:
-
In the RBL Server: field, enter an RBL server name, e.g. zen.spamhaus.org. See https://en.wikipedia.org/wiki/Comparison_of_DNS_blacklists
 for a list of DNSbl servers.
 -
Click Add and the server name appears in the RBL Server list. Click the edit
 icon to edit a server name or click the delete
  icon to delete a server.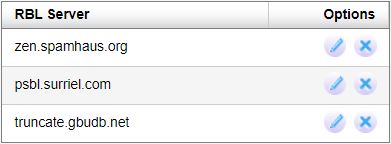
-
Repeat steps 1 and 2 to add additional RBL servers.
Bypassing RBL Checks
You can specify a list of IP addresses or CIDR addresses in the Bypass RBL checks: table that will be accepted, even if they fail an RBL test. This is used to get around RBL false positives.

Follow these steps to add an IP address to the list that will be exempt from RBL checks:
-
Click Add….
-
Using the table below as a reference, complete the field in the Add RBL Exception dialog box.
-
Click Save to save your entry or Cancel to discard changes.
Field | Description |
|---|---|
IP/Network: | Enter a single IP address or network range that may be on an RBL. ImportantMessages from these IP addresses are still subject to other spam and virus checks. |
Netmask: | Select the netmask for the specified IP address. Individual IPv4 addresses will have a /32 (255.255.255.255) netmask. |
Address Type: | Select IPv4 (default) or IPv6. |
Comment: | Optional comment for this entry. |
Testing IPs Against RBL Servers
Follow the steps below to test an IP against the RBL servers you have added:
-
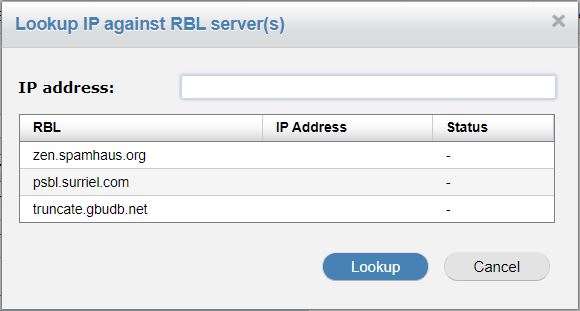
Click Test and the Lookup IP against RBL Server(s) dialog box displays:
-
In IP address: enter an IP address to test.
-
Click Lookup.
-
The Status column will show if the IP address is ‘Listed’ (red) or ‘Not Listed’ (green) for each server.